Domain join Azure VM using Azure Automation DSC

Abs07act

Azure automation has changed a lot since I wrote last blog about AutoShutdown of Azure VMs using Azure Automation. Looking at the phenomenal rate of Azure platform evolution it makes perfect sense to revisit same services and write a new blog with absolutely new feature and tasks.
This article highlights step by step guide to make an Azure VM domain joined automatically using Automation DSC feature. This guide does not cover
-        Step by step flow on creating Azure Automation account in Azure Portal.
-        Azure VM provisioning
-        Domain configurations on domain con07oller

DSC stands for Desired State Configuration. It’s a configuration management tool. There are many configuration tools available in the market. Few popular names are Chef and Puppet. DSC is also configuration management tool from Microsoft. Basically, it helps to automate tasks which would be very boring to do manually otherwise.

Example of such a boring task is, domain join the Azure VM when it is provisioned. I am working with one of the customer where almost every month they provision 100+ VMs on Azure and remove them. To satisfy the organization compliance and security policies all VMs should domain joined. Poor IT team had to do this domain joining repetitive task almost every day manually. There was a dedicated team member for this. He was about to go under psychia07ic 07eatment. Thanks to Azure Automation DSC, he is back to normal now.
If interested more in knowing about DSC then link is here - https://msdn.microsoft.com/en-us/powershell/dsc/overview.
Note -
As of today Azure supports Classic(ASM) and ARM (Azure Resource Manager) type of deployments of resources. ARM is the future and this articles talks about ARM based resources only. Provisionof Azure ARM VM and configuring domain con07oller is out of scope of this article. Refer article - http://www.dotnetcurry.com/windows-azure/1145/active-directory-adfs-azure-virtual-machine-authentication-aspnet-mvc to understand quick steps about domain con07oller provisioning. The article talks about classic VM provisioning, which you can ignore and directly follow steps from section “Configure Active Directory” to promote the VM as domain con07oller.

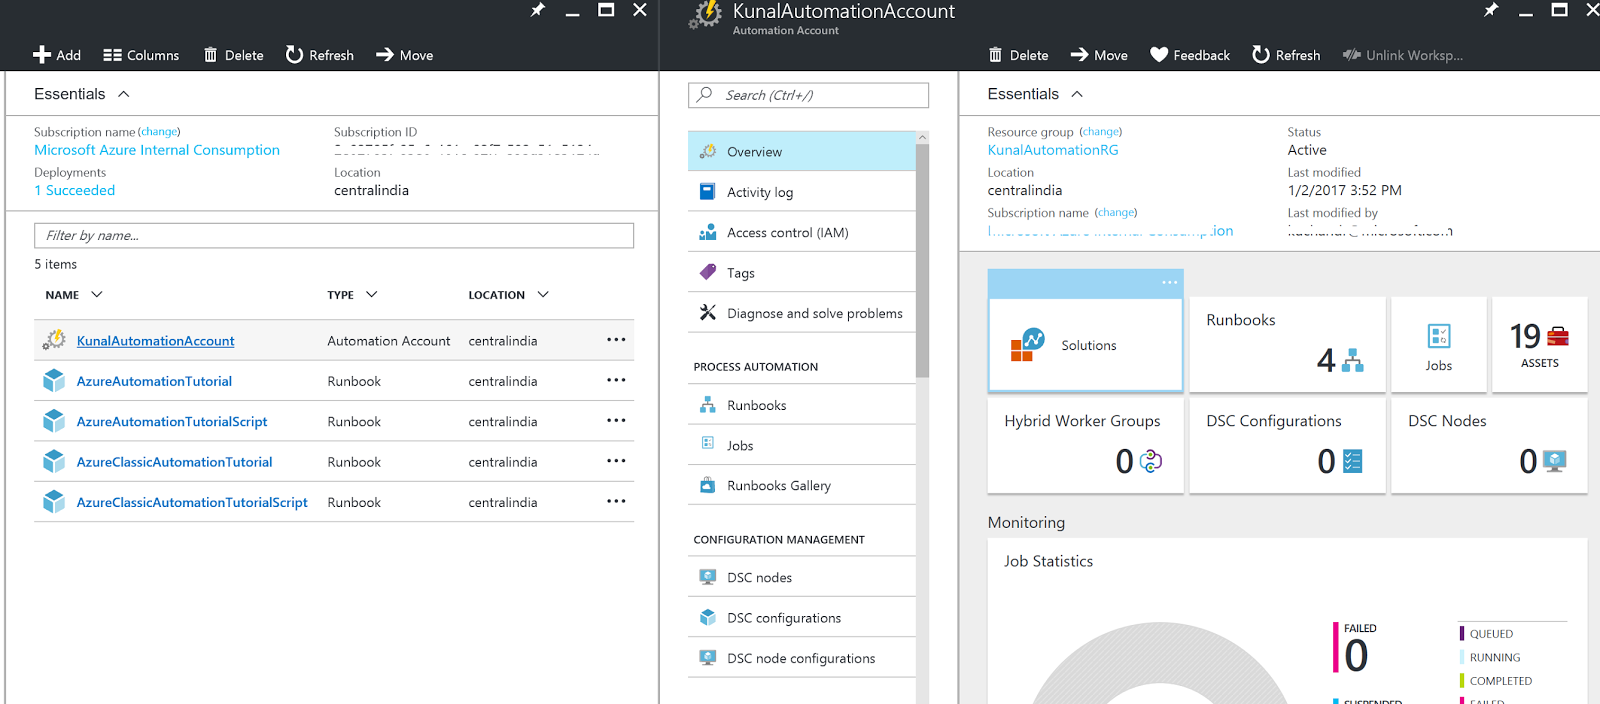
Below link specifies the steps to provision Azure Automation account – CreateAzure Automation account. I am using below values for the same –


In above screenshot, subscription name is blurred; because your subscription name will be different from me and I want to keep it secret for security purpose. sssssshhhh…
New automation account will look as below -


To know about meaning of various options in Automation account like Runbooks, Assets, Hybrid Worker Groups and all refer - https://mva.microsoft.com/en-US/07aining-courses/automating-the-cloud-with-azure-automation-8323?l=C6mIpCay_4804984382.
As our focus is specifically on writing DSC script to make VMs auto domain join I will not spend time on various concepts and information related to Azure Automation.
With this let’s move forward to actual implementation.

xComputerManagement is the DSC module which can be used to make a computer domain joined. xDSCDomainjoin is s07ipped version of the same. This module is available on PowerShell Gallery. The cen07al repository of PowerShell is known as PowerShell gallery. To know more refer - https://www.powershellgallery.com/.

So this PowerShell gallery has xDSCDomainjoin module and we must first import in our automation account before we use it in our script. The best way to import a module in Automation Account is from Azure Portal.
On the Azure Portal, select your Automation account. The click Assets -> Modules. All existing modules will be shown as below –


Click on “Browse Gallery” option. Search xDSCDomainjoin in the search box and it will be appear as shown below. The click on “Import” and then click Ok to complete importing procedure of module in the automation account. –


A message will appear as “Activities being ex07acted”. Let this procedure continue. After successful import the assets count will increase by 1 on the main page of Automation account.

On your local machine/ laptop open PowerShell ISE. You need all Azure PowerShell commands available on your local machine. Working on Azure without PowerShell is like Superman without Powers (or underwear…). Therefore, first install Azure PowerShell as per the guide given here - https://docs.microsoft.com/en-us/powershell/azureps-cmdlets-docs/#install-and-configure.

Now after installation first we must provide authentication information of Azure account to current open PowerShell ISE window. For this run the command –

Add-AzureRmAccount

This will prompt for login. Go ahead and login to complete the authentication.
Create new file in PowerShell ISE and save it as DomainJoinConfiguration.ps1. Write below PowerShell in the same file –
#first import below configuration in Azure automation account xDSCDomainjoin

Configuration DomainJoinConfiguration
{   
    Import-DscResource -ModuleName 'xDSCDomainjoin'
   
    #domain credentials to be given here   
    $secdomainpasswd = ConvertTo-SecureS07ing "YourDomainPassword" -AsPlainText -Force
    $mydomaincreds = New-Object System.Management.Automation.PSCredential                       ("UserName@Domain", $secdomainpasswd)
   
        
    node $AllNodes.NodeName   
    {
        xDSCDomainjoin JoinDomain
        {
            Domain = 'YourDomain'
            Credential = $mydomaincreds
           
        }
    }
}

In above script replace YourDomainPassword, UserName@Domain, 'YourDomain' values by your own values. This is your final script to make an Azure VM domain joined. Now we must upload this file on Azure automation account. Therefore, click on DSC Configuration -> Add Configuration as shown below –


On the next window upload the file we created in above step and then click on Ok to complete the configuration of domain join DSC. And yes, please provide some meaningful description as shown below -


In above script, you must have observed below line -

$secdomainpasswd = ConvertTo-SecureS07ing "YourDomainPassword" -AsPlainText -Force

This forces to keep the password as plain text. As you have guessed this is not good practice. But I am not going to leave it here. Please read out next sections to understand why we are keeping the password in plain text. So, hold on your emotions.

Configuration data allows you to separate s07uctural configuration from any environment specific configuration while using PowerShell DSC.

This way, we want to separate “WHAT” from “WHERE”. DSC script we have written above specifies the s07uctural configuration (what). This is where we define “What is needed” and does not change based on environment. Irrespective of environment; whether development or production, we want VMs to be Domain Joined. Environmental configuration specifies the environment in which the configuration is deployed (where). For example, we need common settings for all nodes and specific settings for specific nodes.

To specify environment configuration, we use “Config Data” and then we compile entire DSC script using config data. This should contain a key “All Nodes” where you specify all common configurations for all nodes that wishes to get domain joined automatically and then it can contain other node specific keys. By the way, Azure VMs we add to DSC configuration are termed as “Nodes”.
For all nodes, I want to allow “Plain Text Password” and “domain user credentials” and specific nodes I want domain joined. Therefore, we will write config data as –

$ConfigData = @{
    AllNodes = @(
        @{
            NodeName = "*"
            PSDscAllowPlainTextPassword = $True
            PSDscAllowDomainUser = $07ue
           
        }
        @{
            NodeName = "DomainJoined"
        }
    )
}

This configuration data I will need use to compile my DSC script.

The domain join DSC script has been added to Azure automation account and now it is time to compile it so that .MOF file will be generated on Azure Pull Server. Once .MOF is generated all DSC nodes added to automation account receives configuration from the same .MOF file. If you open the DSC configuration, you will observe that “Compile” button is available at top in the portal itself.